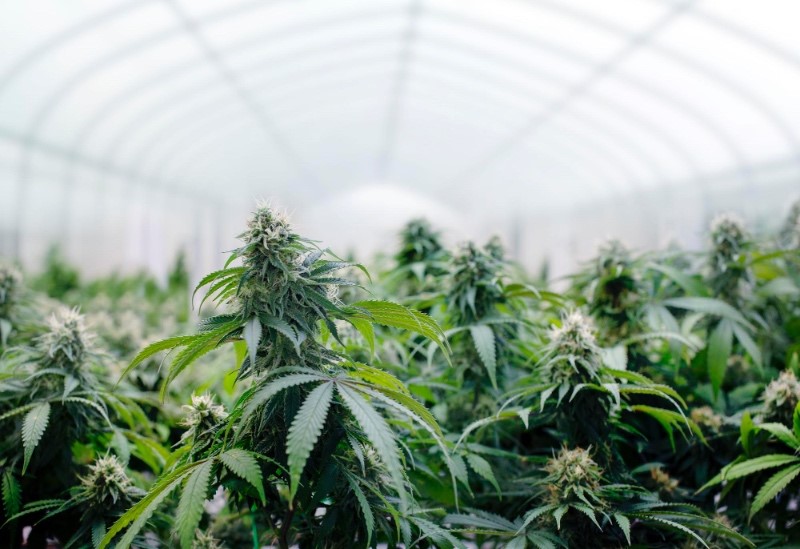

If you’ve made the call to kick off your cannabis cultivation journey, going for an indoor setup is a solid way to kick things off. While there are perks to growing outdoors, the indoor scene gives you more reins, making it a top-notch choice for folks just starting out in the cultivation game.
Some growing pointers hold water whether you’re dabbling in indoors or the great outdoors. But, when it comes to mastering the ropes of growing marijuana indoors, there are a few key things to keep in mind!
Opting for indoor cannabis cultivation comes with a slew of advantages. While it might require an initial investment in equipment, the level of control you gain over your plants is well worth it. You get to call the shots on the precise water, light, and nutrients your plants receive. Plus, you’ll face fewer pest-related headaches.
Forget about being at the mercy of seasons or weather conditions. Indoors, you can kickstart a grow even in the dead of winter, provided you’ve got the gear to regulate your grow room’s light, temperature, and humidity. This flexibility allows for continuous growth, potentially leading to multiple harvests annually.
Privacy is another perk. Even if you’re legally in the clear to cultivate weed, keeping it indoors shields it from curious eyes and potential theft.
First things first, you need a suitable space for your grow room – be it a spare room, garage, basement, or even a well-sealed cupboard to prevent light leakage. Keep in mind that cannabis requires darkness during certain periods, and any light seepage during these times can stress the plants and lead to self-pollination.
For beginners, a modest grow room of around 3 feet by 3 feet is a good starting point, accommodating four to nine plants. This space typically requires just one light, and it’s wise to kick off with a smaller setup to grasp the growth patterns before expanding.
(Note: Some states mandate that cannabis cultivation should be out of public sight, so factor this in when choosing your grow room location!)
Indoor growing calls for more gear compared to outdoor methods, but the upside is the enhanced control over your plants’ environment. Unlike outdoor setups where you’re at the mercy of the weather, indoor cultivation lets you fine-tune temperature, humidity, airflow, and lighting.
Here are some essential items you’ll need:
Grow tent: This special tent prevents light infiltration from the outside and maximizes light reflection inside.
Lights: Opt for lights with suitable wattage (details coming up).
Platform: A platform to house your plant pots.
Plant pots: Various sizes to accommodate your plants.
Extractor fan: To draw hot air away from the top of the grow area.
Intake fan: For pumping fresh air into the room.
Carbon filters: Attach these to your extractor fan to minimize the cannabis odor.
Thermometer: Ensures your plants thrive at a temperature of around 79 to 83 degrees Fahrenheit (26 and 28 degrees Celsius).
Hygrometer: Keeps tabs on humidity levels.
Timer: Handy for automating light cycles and feeding in a hydroponic system, especially when you’re not around.
For the vegetative stage of your growth, aim for an amount of light in the range of 100-125 watts. When transitioning to the flowering stage (typically after 4-6 weeks of vegetation), opt for a grow light with 250 watts or more. Components necessary for your light setup include:
A ballast to control and manage the energy supply required to power the light.
A reflector encircling the top of the light to direct the light downward to your plants.
A lamp with an appropriate wattage. Keep it in the range of 250 to 400 watts for smaller grow rooms with limited headroom. Exceeding the wattage recommendation can lead to diminished returns due to excess heat in the room.
A sturdy chain or similar material to hang your lights.
Lights are available in different types, filled with various gases. During the vegetative stage, many growers prefer metal halide lights for their higher production of blue light. For flowering, sodium lights are favored as they emit more red light. Fluorescent lights can be beneficial for young plants in the seedling stage or for propagating new generations.
LED lights are gaining popularity due to their energy efficiency, quick start-up, and suitability for the entire growing process. However, they may come with a higher initial cost.
While supplementary grow lights like plasma and CDM can enhance bud production, they aren’t essential for smaller grow rooms.
To facilitate plant growth, ensure fresh air and carbon dioxide (CO2) circulation in your grow room. Avoid letting the air become stagnant. Extractor fans and intake fans play crucial roles in achieving this.
The primary function of an extractor fan is to eliminate warm air from the room. Since warm air rises, position your extractor fan high up. Conversely, the intake fan brings fresh air into the area and is placed on the opposite side. The number and size of your fans depend on the size of your grow space.
In addition to fans, you might need a dehumidifier or AC unit, depending on your grow space’s location, to regulate humidity or temperature.
Indoor cannabis cultivation offers extensive control over your growth. You can manage nutrients, lights, water, and even choose the growth medium, such as soil, hydroponic trays, and more.
For beginners, starting with soil growing or a soil-coco coir mix is often recommended. Soil already contains most necessary nutrients, requiring occasional top-ups with nutrient-mixed distilled water. Beginners can also explore coco coir-only growing mediums, but some nutrient knowledge is beneficial, as you’ll need to feed the plants.
Hydroponics or aquaponics is another option, albeit more expensive and challenging, with a steeper learning curve. Understanding the nutrient needs of plants, particularly nitrogen (N), phosphorus (P), and potassium (K), is crucial for success in these methods.
Growing cannabis from seed to harvest involves several crucial steps. From choosing the right seeds to understanding your plants’ lighting and temperature needs, regular equipment checks, and ensuring optimal conditions are maintained. Here’s a step-by-step guide:
Start your indoor weed cultivation journey by selecting the right cannabis seeds. Look for dry, dark-colored, and firm seeds, preferably from a reputable source. When purchasing, decide between feminized and non-feminized seeds.
Feminized seeds, while saving time, are often preferred. Some cannabis varieties well-suited for indoor grows include Skunk #1, Northern Lights, Blueberry, Blue Dream, Master Kush, OG Kush, and Sour Diesel.
Beginners may find auto-flowering or feminized seeds more manageable!
Initiate the germination process by soaking seeds on paper plates or between paper towels until a taproot emerges, usually taking a few days. Once seedlings appear, transfer them into the chosen growing medium (such as fabric pots filled with soil).
Plant them approximately 10 mm deep, ensuring the medium remains damp without overwatering.
Wait for your marijuana plants to transition into the vegetative stage. Provide 18-24 hours of light per day with temperatures between 70 to 85 degrees Fahrenheit.
Regular watering is essential, and additional nutrients, especially nitrogen, should be supplied. If you didn’t opt for feminized seeds, remove all male plants during this stage.
Alternatively, you can purchase clones from a dispensary, bypassing the seed selection and germination process, and even skipping the vegetative growth stage entirely. This streamlines the process and helps you find a suitable plant with less effort.
In the vegetative stage, some advanced indoor growers opt for plant training techniques like the Sea of Green (SOG) or the Screen of Green (SCROG) methods to enhance yield potential.
Sea of Green (SOG): This method involves maintaining a mother plant in a permanent vegetative state and taking cuttings for propagation.
These cuttings are then placed directly into a 12-dark/12-light flowering cycle. SOG is suitable for shorter, compact plants, creating a dense growth area. It can accelerate overall growing times and increase the number of growing cycles in a year.
Screen of Green (SCROG): This technique employs a wire grid, with growers weaving plant branches through the mesh.
It allows redirection of branches lengthwise across the screen, creating a flat, horizontal canopy. SCROG is ideal for larger plants that might otherwise outgrow the space and ensures uniform growth.
In the flowering phase, female plants focus on bud development, resulting in thick, aromatic buds. Transition to a 12-hour dark and 12-hour light cycle. Cease plant training activities, stop nutrient supply toward the end of flowering, and initiate a flushing period with water.
Flowering durations vary based on the plant type and phenotype. Indicas and auto-flowering strains finish in about six to nine weeks, hybrids in eight to 12 weeks, and sativas in 10-14 weeks.
Phenotype expression influences the timing, with indica-dominant hybrids usually finishing earlier than sativa-dominant ones.
Some growers determine the harvest time by observing trichomes, progressing from clear to cloudy and, eventually, amber.
After the flowering stage, the harvest begins by cutting the main stem, followed by drying and curing.
Hanging the plants to dry is the initial step, and the entire process, including trimming and curing, can take up to five weeks.
For a detailed guide on harvesting, drying, and curing, explore our posts on these topics!
To learn how to overcome a romantic breakup, you must keep in mind that although…
Being in Barcelona for the International Cannabis Awards and Spannabis Fair Week is like visiting…
Every day, people are becoming increasingly aware of their role in society and the need…
All phones can experience occasional heat buildup, which becomes problematic when it reaches a level…
Powerbocking, also referred to as "power-rizing," "blade running," and "jump stilting," is a sport where…
If you love exploring the underwater world, this museum is for you. The Underwater Museum…


